Saving time or money on a mainsail cover
Choose which corners to cut when making your own mainsail cover
You can make a mainsail cover yourself. It’s easy. Some measurements, fabric, thread, a bit of lanyard rope, some fasteners, and a sewing machine. And a couple of hours.
For the Mercedes Benz of mainsail covers, Sailrite has everything you need. I mean everything, even sewing machines, specialized tools, and an instructional video.
But you don’t have to go overboard. Simplify your cover and source your own parts for the Toyota Camry of mainsail covers.
Measurements
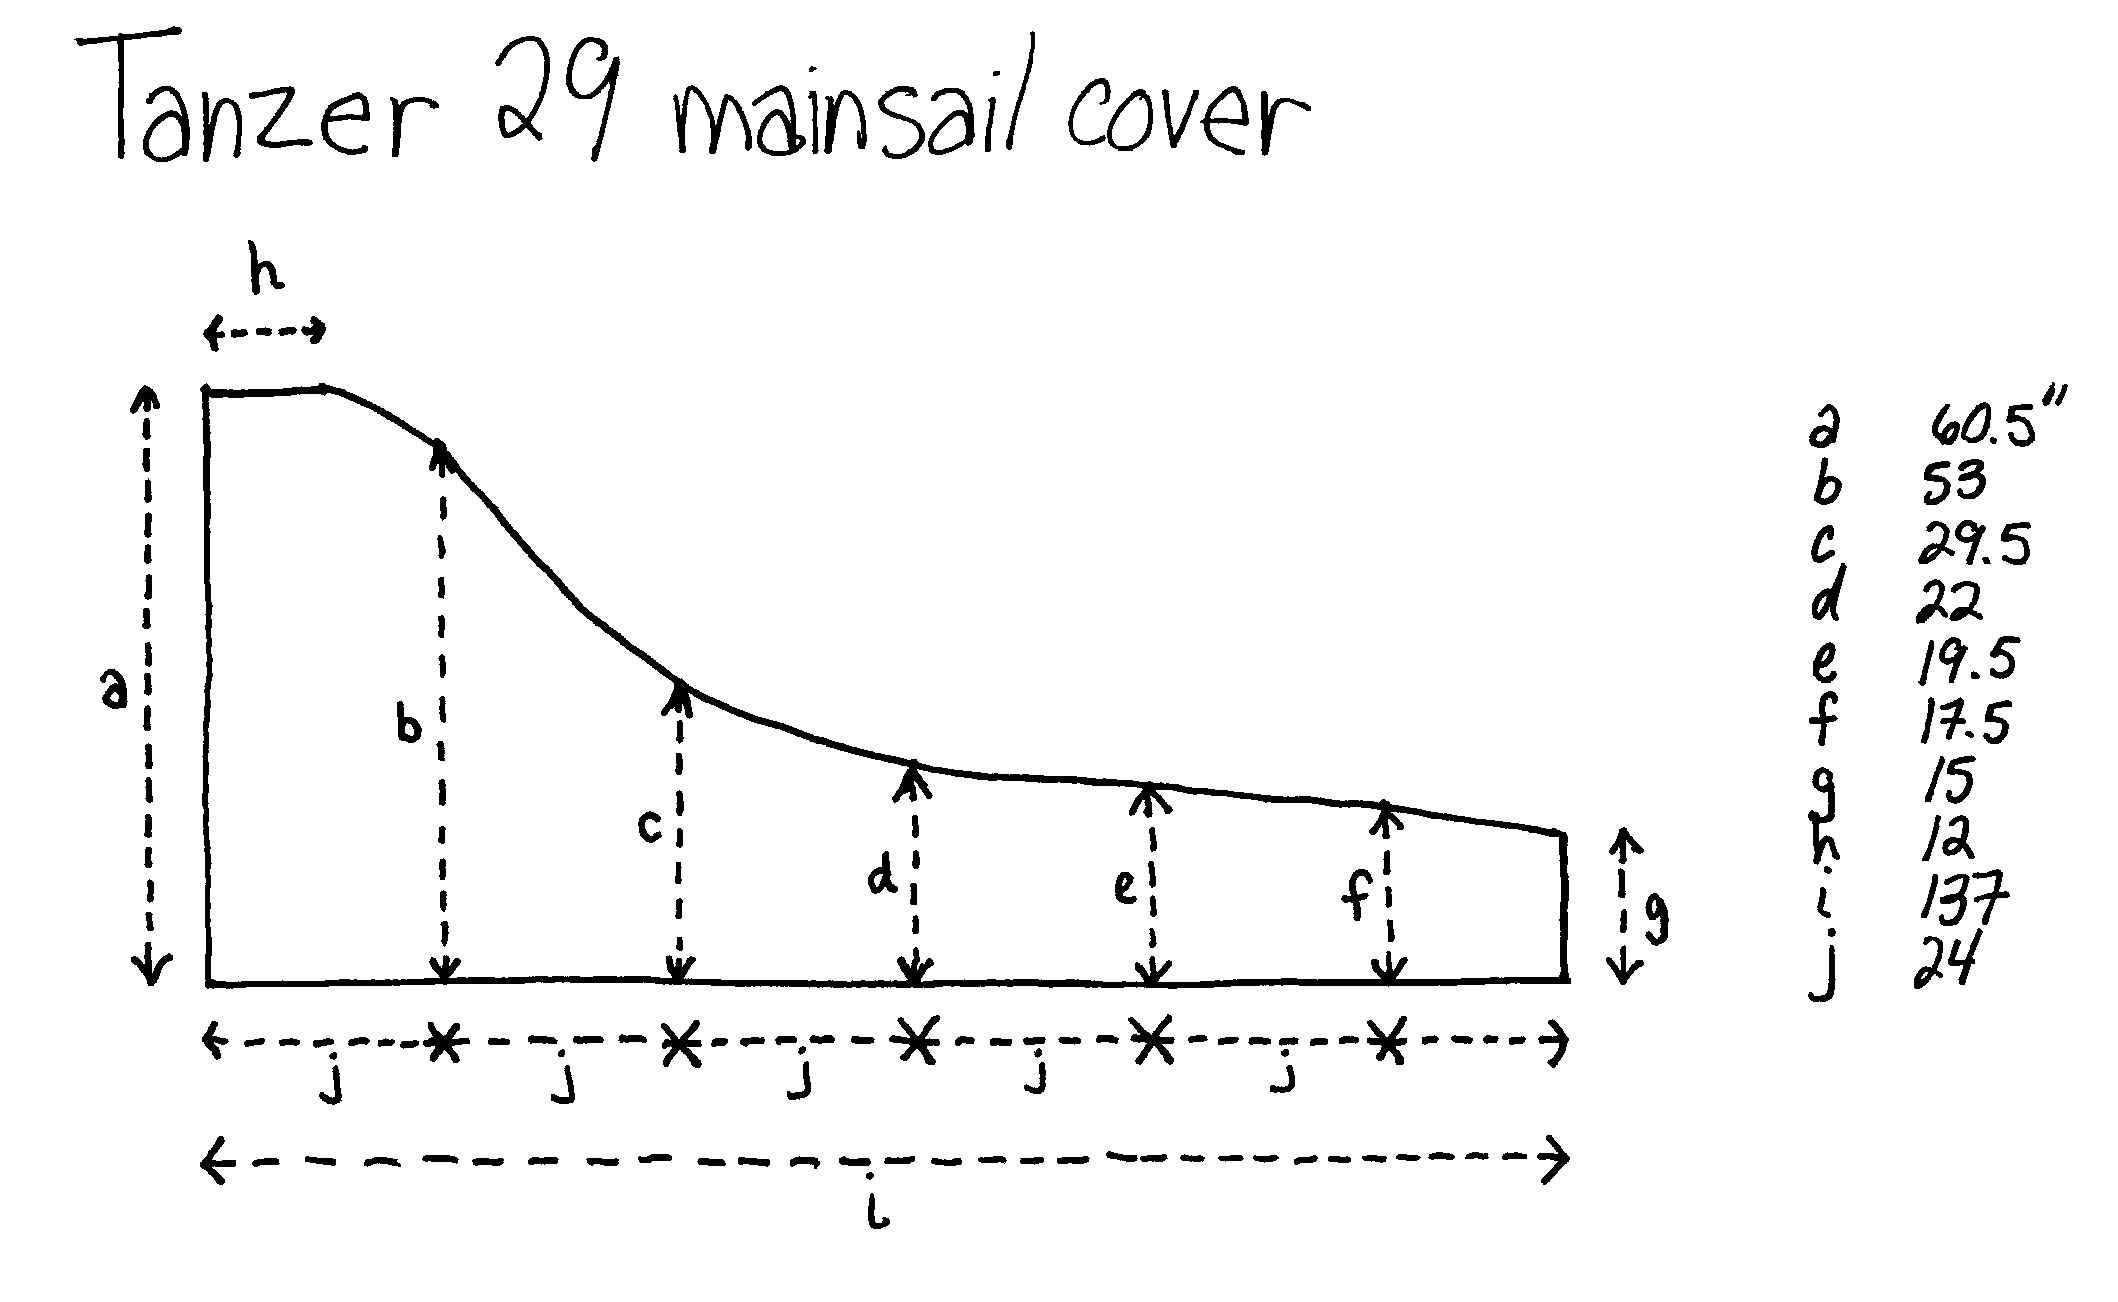
Start with the measurements. They don’t have to be precise. You’re not making a bespoke three-piece for minor nobility.
If you’re replacing an old cover, just measure that. Boom. Done.
If you’re starting from scratch, before you take out the measuring tape, flake your sail neatly on your boom like a good sailor.
The horizontal measurements are obvious enough. Add a few inches for a lanyard sleeve at the aft end of the cover.
For the vertical lengths, start at the top center of the sail and wrap your measuring tape around to the bottom center of the boom. Add 4-6 inches for esthetics, shedding water properly, and making it easier to close the cover.
At the top of the cover that goes around the mast, add a a few inches for another lanyard sleeve.
You want it to fit all your mainsails, current and future. The older your sail, the more it compresses when you stack it. A new sail is less pliable, so it stacks higher, especially as you get closer to the mast. If your sail isn’t as stiff as it used to be (hey, there’s no shame in that), add a few inches of vertical height to your measurements. This way you can reuse your cover when you replace your mainsail.
And don’t forget to add for seam allowances and other sewing requirements.
Fabric
The thing is, it’s just a cover. You win when it keeps the sun and rain away. The only differences between a proper mainsail cover and a handful of plastic garbage bags is esthetics and price.
On the price spectrum, cotton canvas is the most inexpensive. And easy to clean, tough, at your fave fabric store, and is easy on the environment. At the other end, Sunbrella is the most expensive but hyper-engineered to do everything that a marine canvas should, and more. I think it does your income taxes too.
And there’s a ridiculously wide range of fabrics to
confuse you in between.
I’ve made a cover with $20 of discounted acrylic canvas for outdoor furniture that lasted for 10 years.
Whichever you pick, wash it a couple of times to get rid of excess dye. Staining your main is a pain you’ll disdain.
Fastenings
Under the boom, twist-lock fasteners are the most popular. They’re compact, inexpensive, easy to install, and work well even in bad weather or in the dark.
Or you can go old school with a few lanyards along the bottom edge. If you go this route, get spur grommets to protect the fabric. They cost less than twist lock, and installation time is about the same.
Brass grommets are the least expensive, durable enough, and easiest to work with. Stainless is the most expensive, maybe overkill for durability, and a harder metal when pressing into the fabric. Avoid nickel.
A useful distance between fasteners is 18 inches, or 2 fasteners every 3 feet.
At the forward edge of the mast, a zipper is the most popular. But if you’re doing the sewing, then zippers are a fun challenge. My preference here is the twist-lock fastener again, for easy installation and use.
At the top of the cover that goes around the mast, add a lanyard.
At the aft end of the boom, you need a lanyard to attach the cover at the end of the boom. Also consider a 2nd lanyard to prevent the cover from moving forward.
Twist lock fasteners
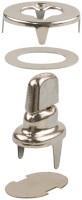
The purser’s preferred way to close a mainsail cover
They come in 5- or 10-packs. A 5-pack is enough for a boom up to around 8 feet long.
Remember to get both the studs and the button backs.
Grommets
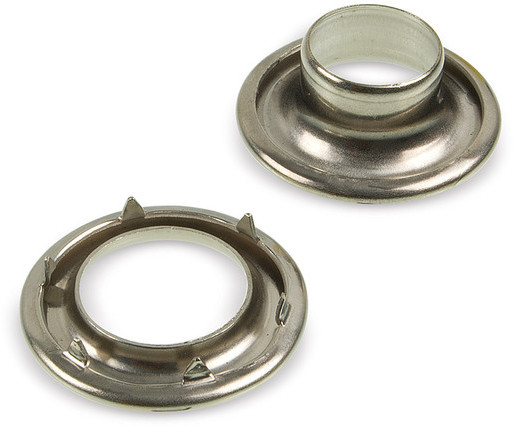
Useful tying your cover with lanyards
You’ll need 2 grommets per attachment point.
Sewing machine
You need a sewing machine that can take the abuse. Four or more layers of thick fabric are a quick way to wreck a home sewing machine. Happy DIY Home hipped me to their handy guide for choosing a machine.
If you don’t feel like sewing yourself, call around for a professional. Your neighborhood dry cleaner, tailor, or seamstress can help. I got lucky at a nearby duvet store, Ungava. They do excellent sewing at a reasonable price. I show up with the measurements and fabric, they do the rest.
At your service
Humbly yours,
Marc, Supreme Purser